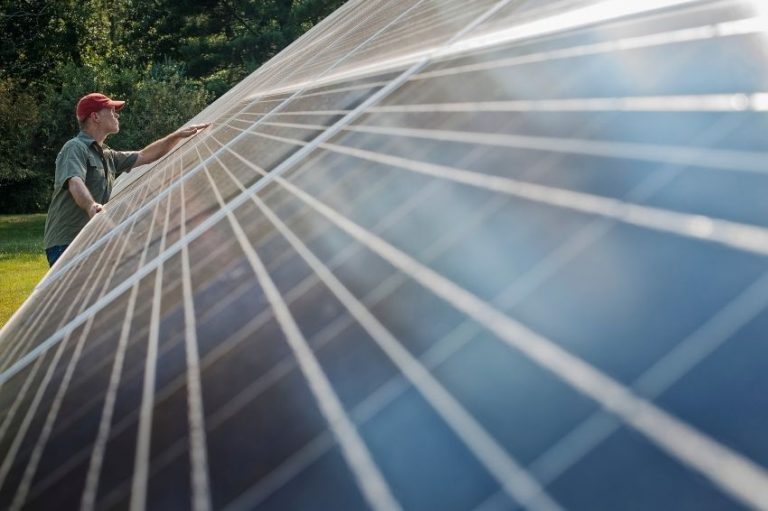
Few people know, but photovoltaic modules have manuals. The main ones market manufacturers provide documents which provide guidance on best practices for transporting, handling and fixing photovoltaic modules.
In this article, we will talk about fixation. The subject shouldn't be a secret, but in a market that still lacks training at all levels, from design to installation, it never hurts to remember.
Installation methods
There are basically two ways to fix a photovoltaic module:
- Through the frame fixing holes or;
- Fixing with staples or clips on the frames.
Method 1 is uncommon and used only for assembling modules in customized structures, requiring that the structure have holes in the same position as the existing holes in the modules. Method 2 is the best known of all. On roofs, in ground plants and in practically all existing photovoltaic systems, it is the preferred method due to the agility it offers in assembly.

Method 2 is the best known of all. On roofs, in ground plants and in practically all existing photovoltaic systems, it is the preferred method due to the agility it offers in assembly.

In this case, the modules are supported and pressed against metal support structures, which can be stringers (in a ground plant) or aluminum profiles (in rooftop installations).

There are suppliers that offer fixing solutions for all types of roofs. There is a suitable solution for every need. Fastening solutions for special cases, which should be rare, can be studied and developed with many of the manufacturers and distributors currently on the market.
What all fixing solutions have in common, thinking about method 2, is the presence of rails or support profiles (in aluminum) or galvanized steel stringers (more common in soil plants).
Almost all roof fixing systems use some type of rail or support profile, as shown in the following figure. What can change from one situation to another is the method of fixing the rails for each type of roof – something we will cover in another article.

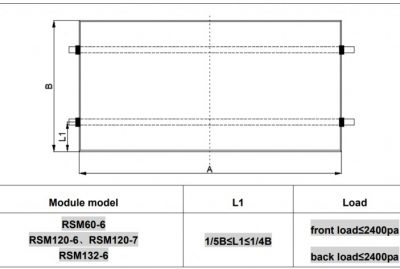
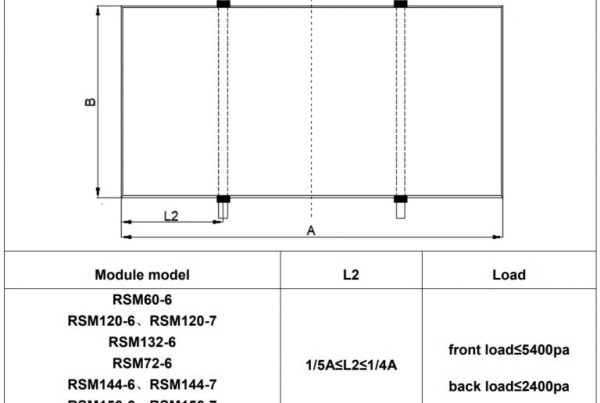
The correct way to fix the module
Even experienced installers and designers ignore the fact that fixing clips cannot be secured in any position on the frame. The distances defined by the manufacturer must be followed, otherwise there is a risk of damage to the modules or loss of warranty. The following figures show two installation methods found in the document Installation and maintenance manual of mono-facial module products, from the Risen Solar.
Two installation modes are possible: longitudinal or perpendicular. In the first case, the longitudinal axis of the module is parallel to the fixing rails. In the second case, the module axis is positioned perpendicularly. In both cases, the correct position of the fixing points must be observed, as shown in the following figures.


2 Responses
It is also worth noting that figure 3 regarding fixing to metal tiles is not appropriate, as stated in manuals from many manufacturers (Canadian, JA SOLAR and others), since a minimum of 10 cm is required for correct ventilation of the modules. , which may compromise future guarantees.
Hello Gleison, we will cover this topic in a technical article next month.